Follow along with this Microsoft Excel tutorial to learn how to insert a footer in Excel.
Often you need to print Excel worksheets as reports for the physical distribution to different departments, clients, students, etc. It’s customary to add a footer in such printed documents for several reasons.
You might want to add page numbers, copyright disclaimers, security notifications, and company branding. Though it’s fairly easy to add footers in Microsoft Word by simply clicking on the footer area, that’s not the case for Microsoft Excel.
Excel doesn’t readily allow you to add footers unless you know the tricks to do so. Read this article until the end to learn various methods to add footers in Excel.
Add Footer in Excel Using Page Layout View
You must enable the appropriate view to add a footer to a worksheet. This is the Page Layout view.
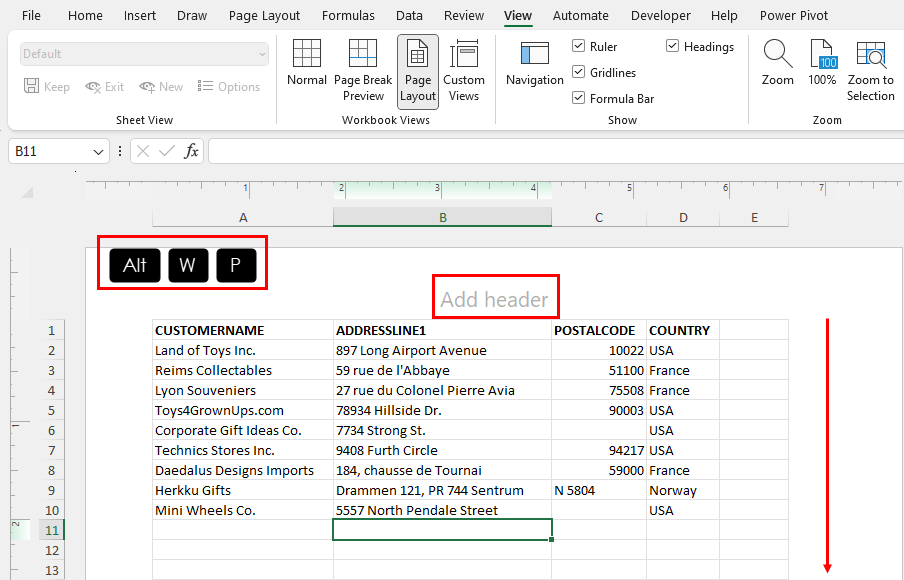
Go to the worksheet to which you want to add a footer.
Press Alt + W + P to access the Page Layout view.
You should now see the Add header placeholder text in the worksheet.
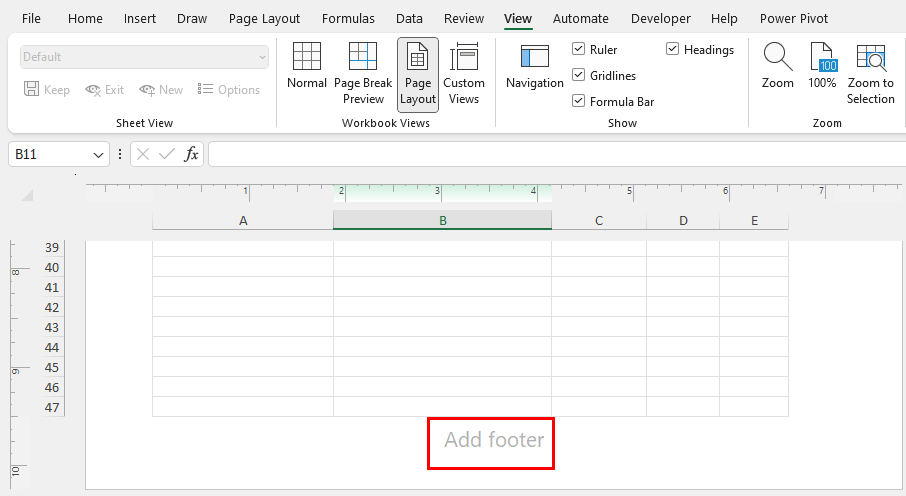
Scroll to the bottom of the page to find the Add footer text.
Click on that to enable three footer cells in the spreadsheet.
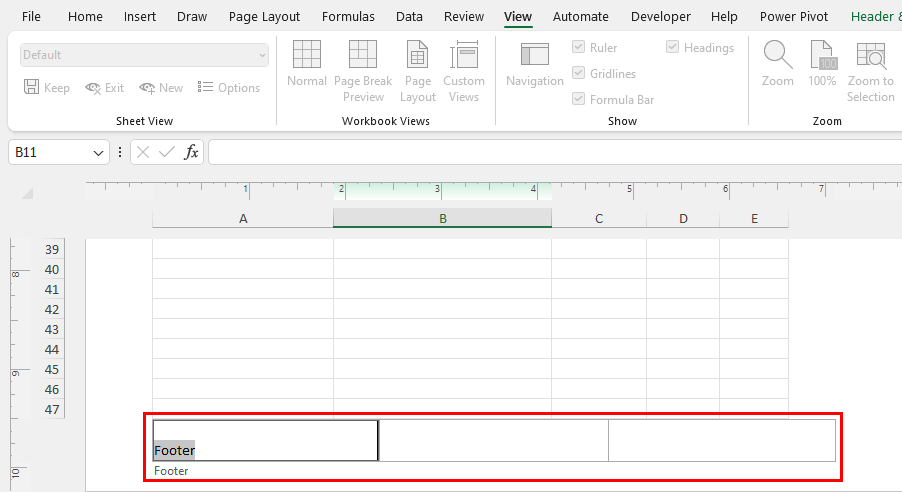
Press the Tab button to cycle through the three cells.
You can now type your footer text or numbers as per your requirements.
You can press Alt + W + L to go back to the original spreadsheet view of Excel.
Now, when you go to the Print Preview screen, you shall see the footer texts in the worksheet pages you’re printing.
Add Footer in Excel From Insert Tab
The Header & Footer command button is the default way to access the footer option in an Excel spreadsheet. It’s inside the Insert tab of the Excel ribbon menu.
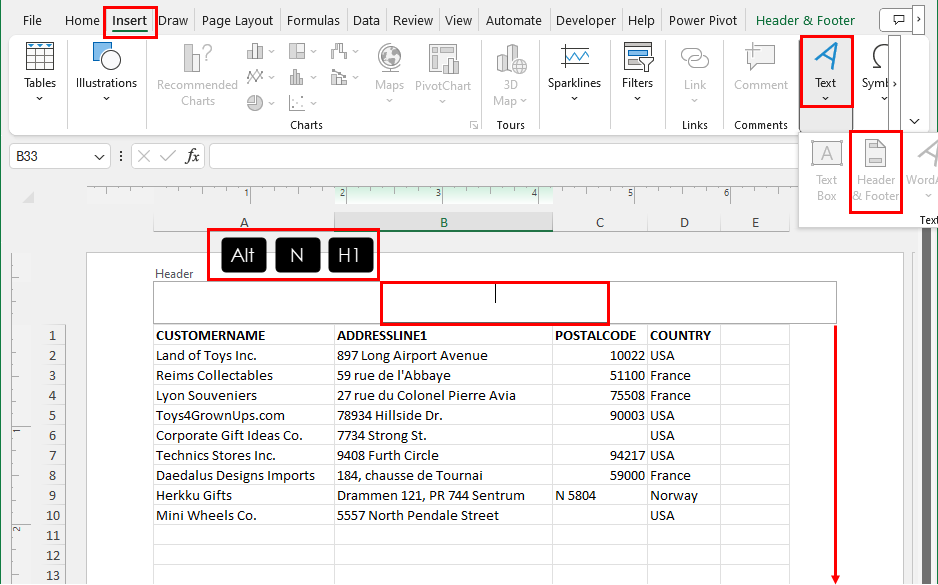
You can press Alt + N + H1 to start inserting a header text automatically.
Now, click anywhere on the worksheet page to disable the header text.
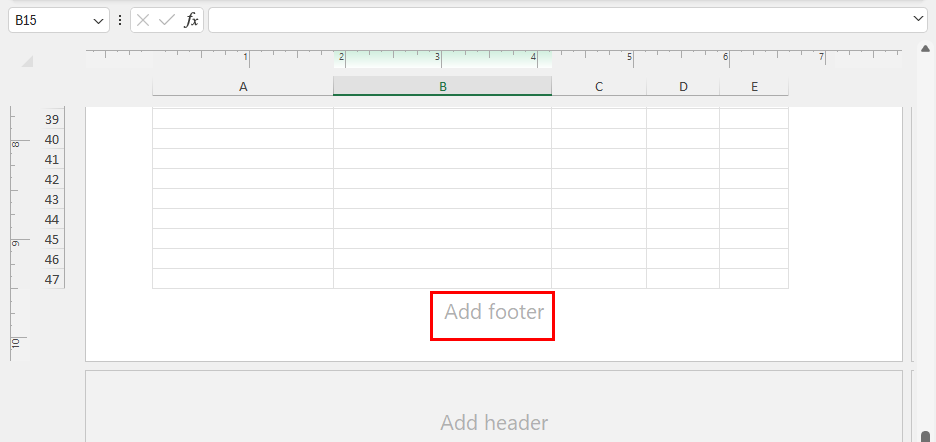
Scroll down to find the Add footer option at the bottom of the page.
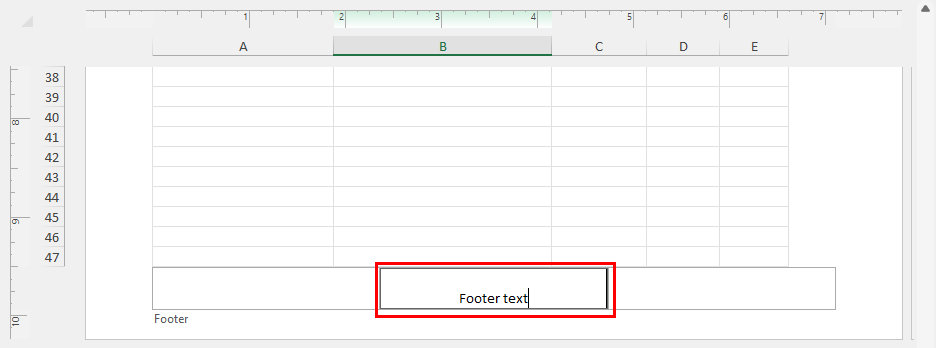
Click on any of the footer cells to start entering your content.
Add Footer in Excel Using Page Setup Dialog
Another way to add a footer in Excel without accessing the Page Layout view is the Page Setup dialog box. However, you can’t see the footer text after adding that. You must enter the Page Layout view or Print Preview to visualize the footers you’ve added.
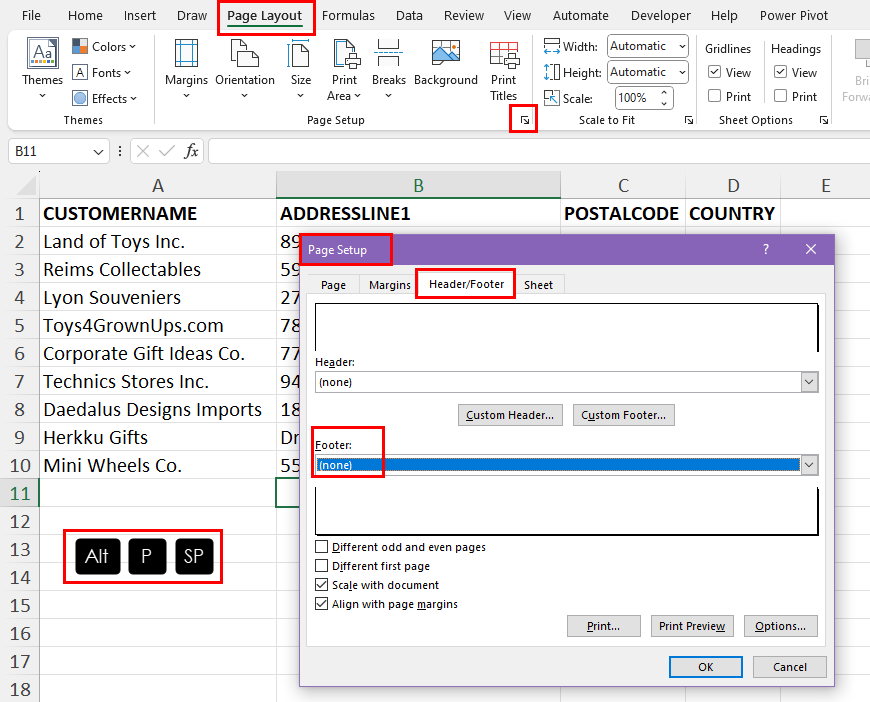
You can press Alt + P + SP to call the Page Setup dialog box.
You shall see the Page tab in the Page Setup dialog. Go to the Header/Footer tab.
If you haven’t set up a custom footer yet, the Footer drop-down menu shall show the None option.
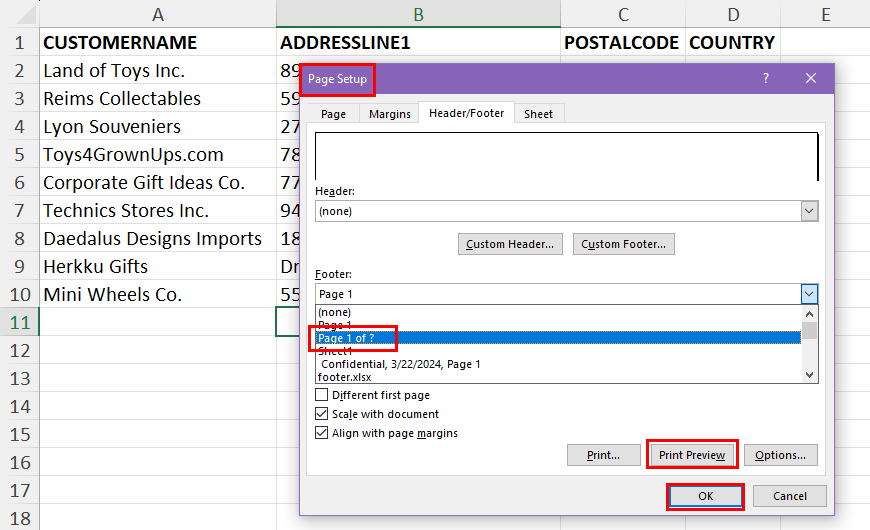
Click on that to expand the list of default footers.
Choose any of the footer formats from the list.
Click Print Preview to visualize how Excel shall print the footer in your spreadsheet pages.
If you’re satisfied with the view, click OK to apply.
Add Footer in Excel for the Chart Sheet
You can’t use options like the Page Layout command in the View tab or Excel Status Bar to insert a footer in a Chart sheet in Excel.
The only option to add a footer is through the Page Setup dialog box.
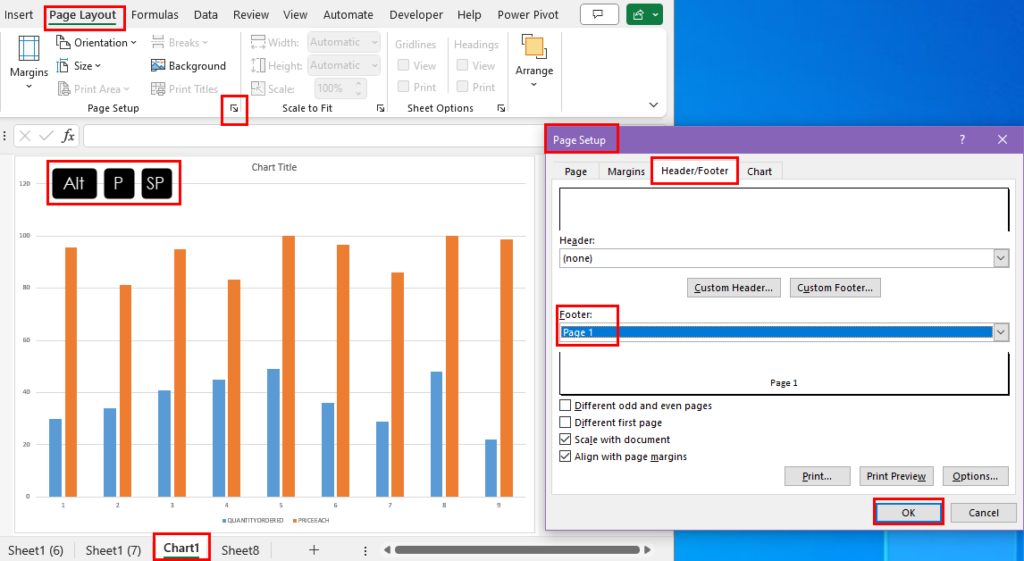
For a Chart sheet, the Page Setup tool can be accessed using the Insert > Header & Footer command button or by pressing the shortcut key Alt + P + SP.
Now, the rest of the process of entering a new footer or editing an existing one is the same as explained so far.
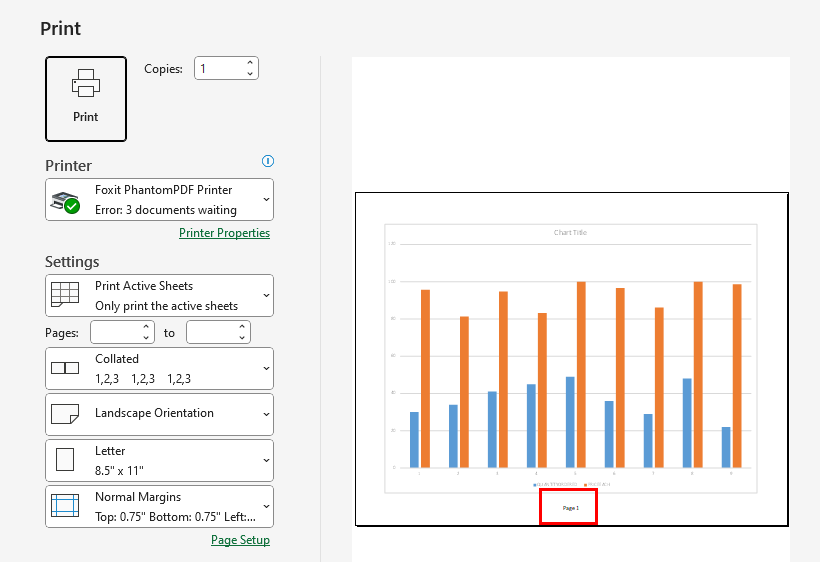
You can’t see the footer yet. However, it’ll show up if you enter the Print Preview screen.
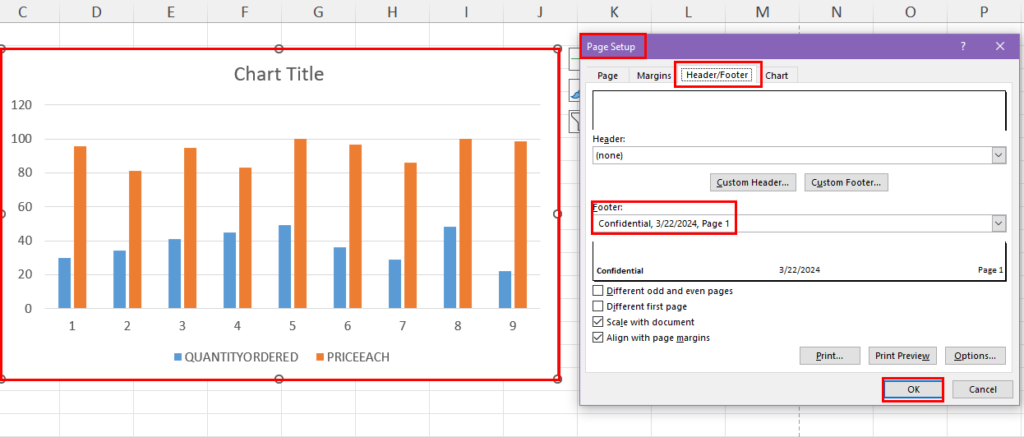
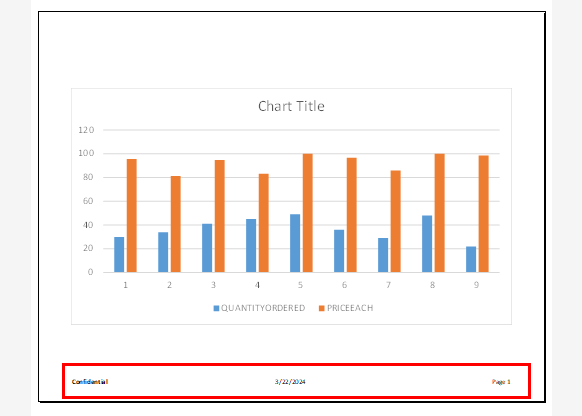
If you need to add a footer to a chart of your worksheet, follow the steps mentioned above.
Adding an Image Footer in Excel
This feature enables you to add company logos, brand images, or any other relevant picture as a footer in your spreadsheet reports.
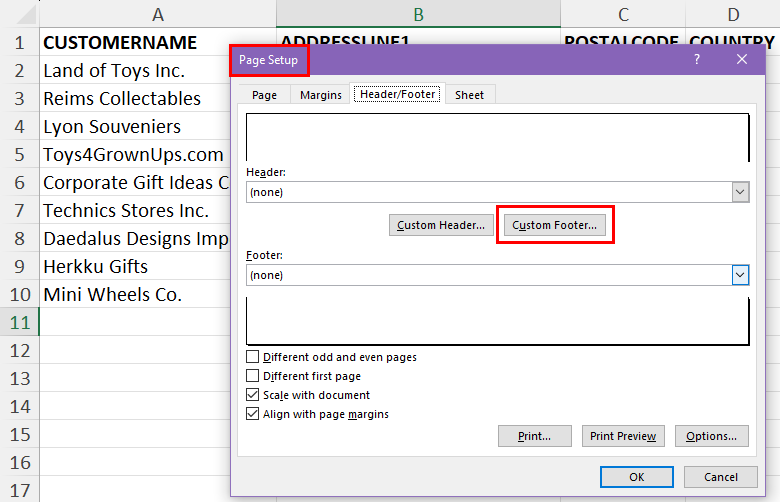
Press the hotkey Alt + P + SP to bring up the Page Setup dialog on the target worksheet.
Navigate to the Header/Footer tab and click on the Custom Footer button.
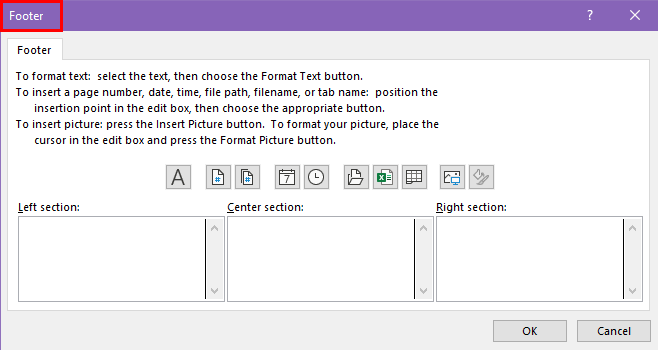
You shall now see the Footer dialog box.
Click on a footer field, like the Left section, Center section, or Right section where you wish to add the footer image.
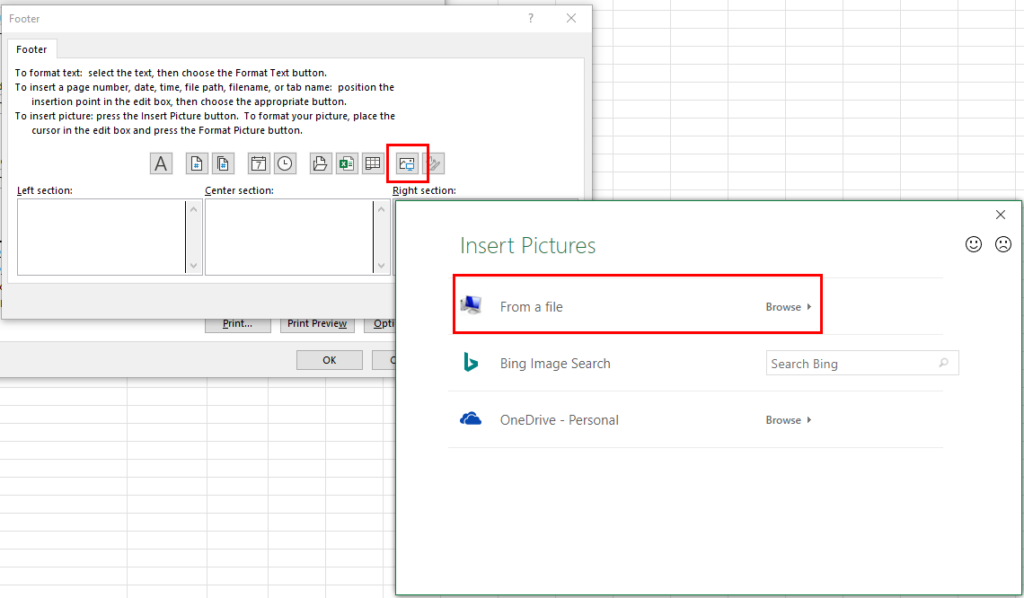
Click on the Insert Picture button above the Right section footer field.
To upload an image from the PC, click on the From a file option and choose your image file.
Click OK to apply the footer.
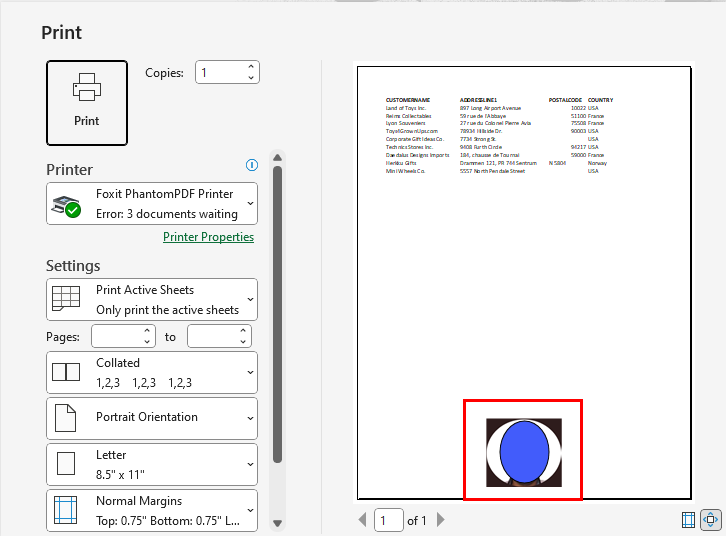
Go to the Print Preview screen to find out how the image shows up on the page.
Customizing a Footer in Excel
On the Page Setup dialog, in the Header/Footer tab, you shall find the following options to customize the position or interval of footers:
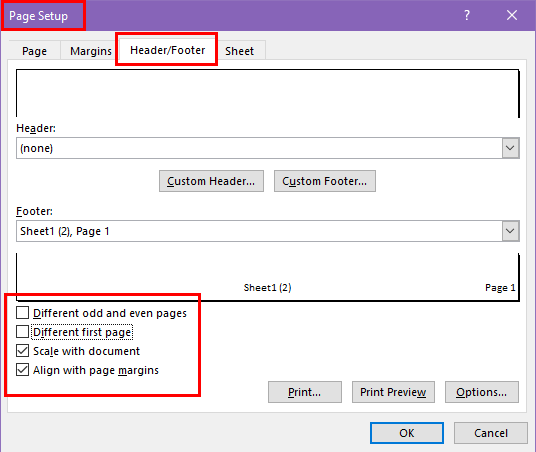
- You can ensure the first printed page remains clean by eliminating headers and footers by selecting the Different first page check box.
- For distinct headers and footers on odd and even-numbered pages, opt for the Different odd & even pages check box.
- Check the Scale with document box to maintain consistency in font size and scaling with the worksheet. Alternatively, deselect this feature for independent font size and scaling in headers or footers.
- Align header or footer margins precisely with the left and right worksheet margins by selecting the Align with page margins check box. If you need specific margins for headers and footers distinct from worksheet margins, clear the Align with page margins option.
You can add various footer elements in Excel from the Footer dialog. Find below the content you can add and their customization options:
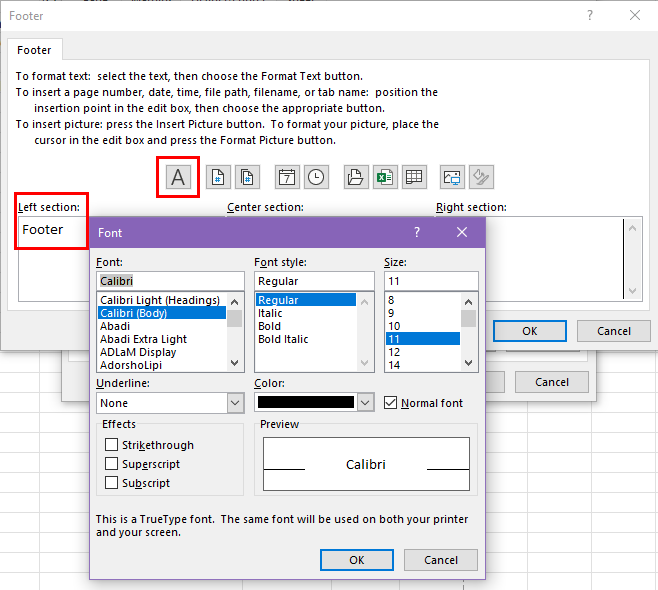
- To change the font of the footer you can select the text and click on the Format Text (A) on the Footer dialog. In the Format Text dialog, you shall also find customizations like font size, color, underline, font type, and more.
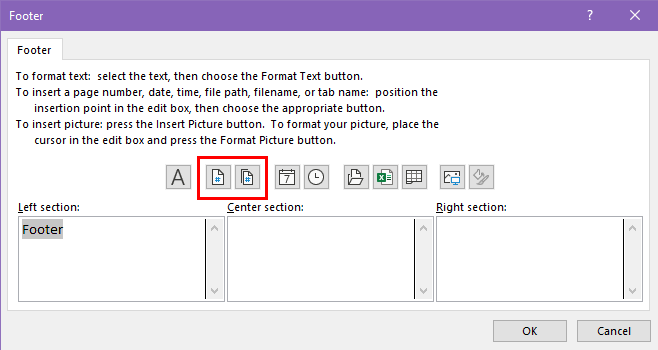
- If you wish to add page numbers, you can click on the Insert Page Number button. You can also use the Insert Number of Pages button to add the relevant content.
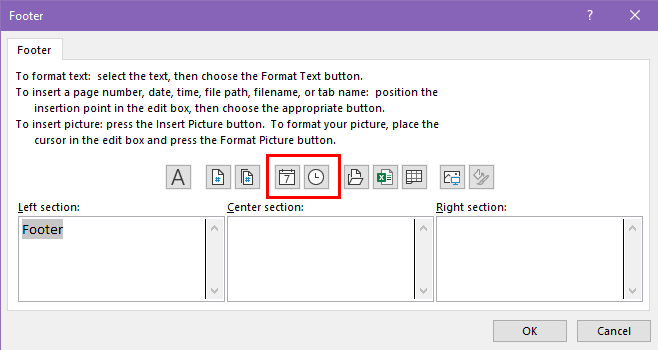
- Do you want to add the date and time as a footer in your Excel reports? You can use the Insert Date and Insert Time button.
Other important footer items you can add are:
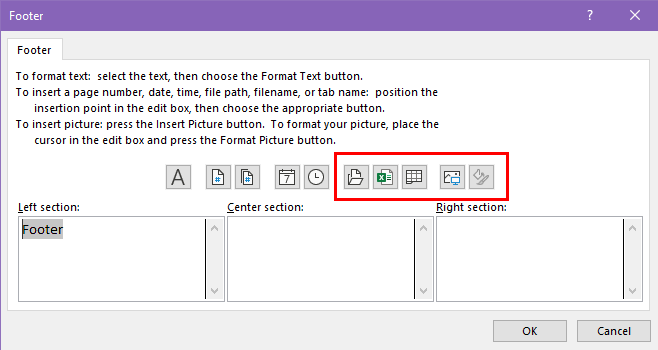
- Insert File Path
- Insert File Name
- Insert Sheet Name
- Insert Picture
- Format Picture (only active if you’ve added a footer image)
Add Footer in Excel Using Excel VBA
You can use the following VBA script to add a footer in Excel with guided input boxes. All you need to do is create a VBA macro using the script. When you run it, the script shall show visual prompts so you can create a custom footer.
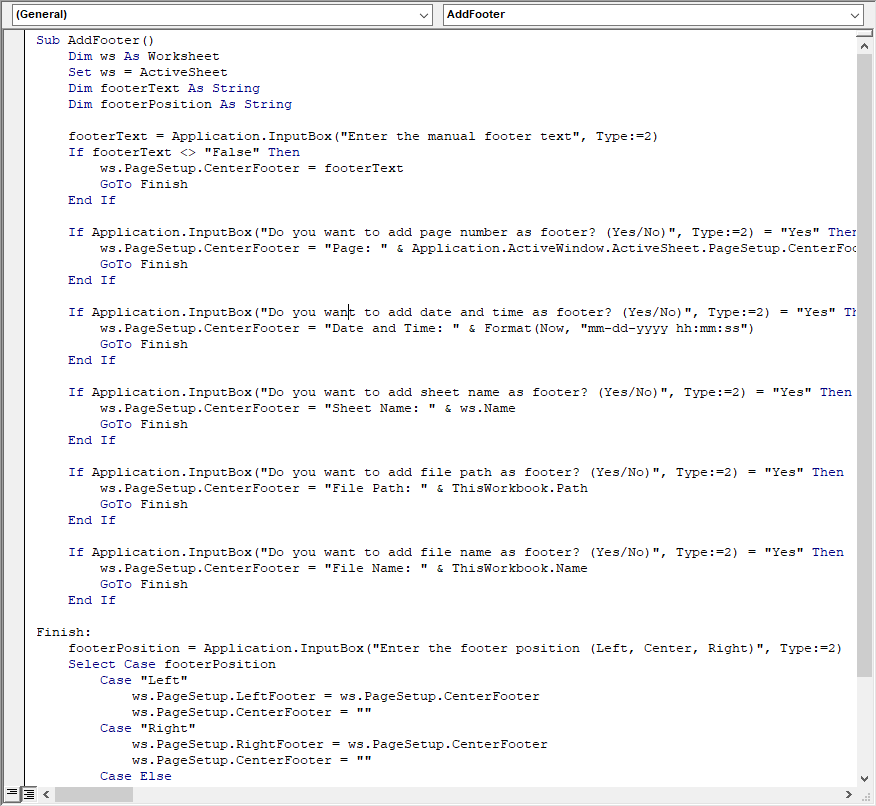
Sub AddFooter()
    Dim ws As Worksheet
    Set ws = ActiveSheet
    Dim footerText As String
    Dim footerPosition As String

    footerText = Application.InputBox("Enter the manual footer text", Type:=2)
    If footerText <> "False" Then
        ws.PageSetup.CenterFooter = footerText
        GoTo Finish
    End If

    If Application.InputBox("Do you want to add page number as footer? (Yes/No)", Type:=2) = "Yes" Then
        ws.PageSetup.CenterFooter = "Page: " & Application.ActiveWindow.ActiveSheet.PageSetup.CenterFooterAddress
        GoTo Finish
    End If

    If Application.InputBox("Do you want to add date and time as footer? (Yes/No)", Type:=2) = "Yes" Then
        ws.PageSetup.CenterFooter = "Date and Time: " & Format(Now, "mm-dd-yyyy hh:mm:ss")
        GoTo Finish
    End If

    If Application.InputBox("Do you want to add sheet name as footer? (Yes/No)", Type:=2) = "Yes" Then
        ws.PageSetup.CenterFooter = "Sheet Name: " & ws.Name
        GoTo Finish
    End If

    If Application.InputBox("Do you want to add file path as footer? (Yes/No)", Type:=2) = "Yes" Then
        ws.PageSetup.CenterFooter = "File Path: " & ThisWorkbook.Path
        GoTo Finish
    End If

    If Application.InputBox("Do you want to add file name as footer? (Yes/No)", Type:=2) = "Yes" Then
        ws.PageSetup.CenterFooter = "File Name: " & ThisWorkbook.Name
        GoTo Finish
    End If

Finish:
    footerPosition = Application.InputBox("Enter the footer position (Left, Center, Right)", Type:=2)
    Select Case footerPosition
        Case "Left"
            ws.PageSetup.LeftFooter = ws.PageSetup.CenterFooter
            ws.PageSetup.CenterFooter = ""
        Case "Right"
            ws.PageSetup.RightFooter = ws.PageSetup.CenterFooter
            ws.PageSetup.CenterFooter = ""
        Case Else
            ' Center is default
    End Select

    MsgBox "Footer added successfully!", vbInformation
End Sub
Find out how to create a macro using the above script, by going through this quick Excel tutorial:
📒 Read More: How To Use The VBA Code You Find Online
Once you’ve created the macro, hit Alt + F8 to bring up the Macro dialog.
Select the AddFooter macro and hit the Run button.
Once you execute the macro, Excel shall show a series of prompt boxes to collect information about your footer.
If you enter an input in a prompt box and click OK, the script shall end and enter the footer.
If you click Cancel in one prompt, Excel shall show the next prompt.
Here is the order of prompts the script shall show:
- Manual footer text
- Page number as footer text
- Add date and time as footer text
- Sheet name as a footer
- File path as a footer
- File name as a footer
- Footer position selection
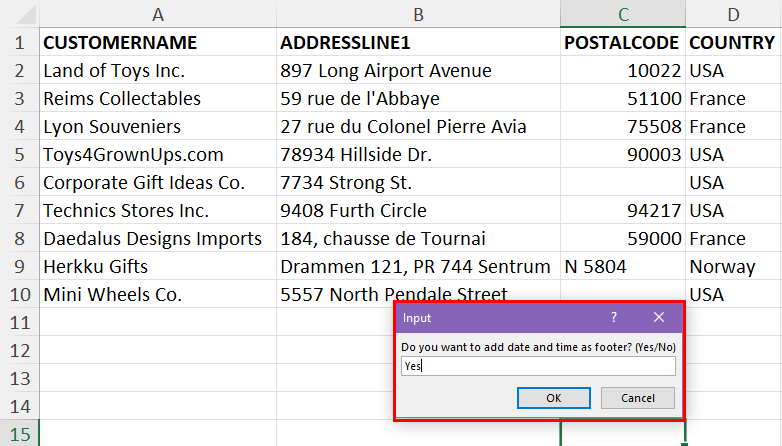
For example, I entered Yes in the Date and Time prompt.
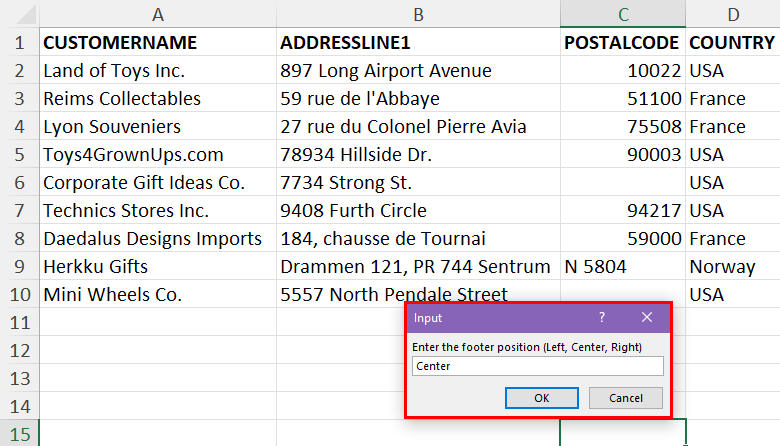
For the final input box, I’ve chosen the Center as the footer position.
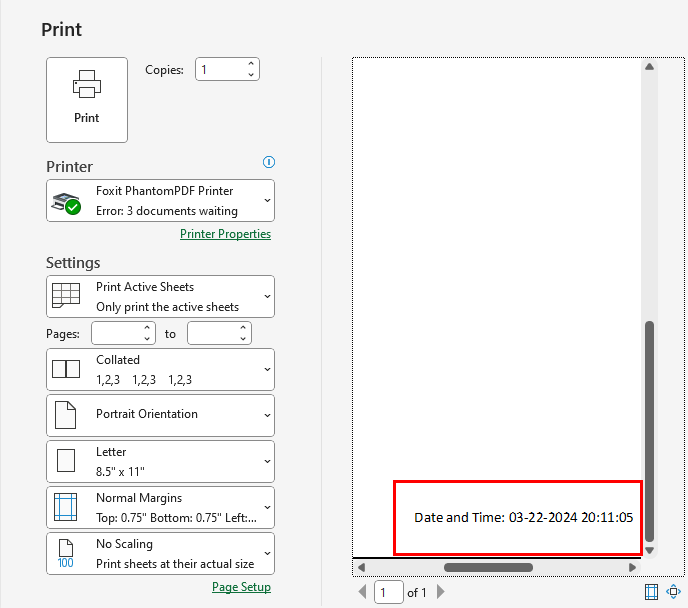
Find above a sample of date and time inserted as a footer using the VBA script.
Here’s another cool VBA script to programmatically add an image as a footer for the active worksheet:
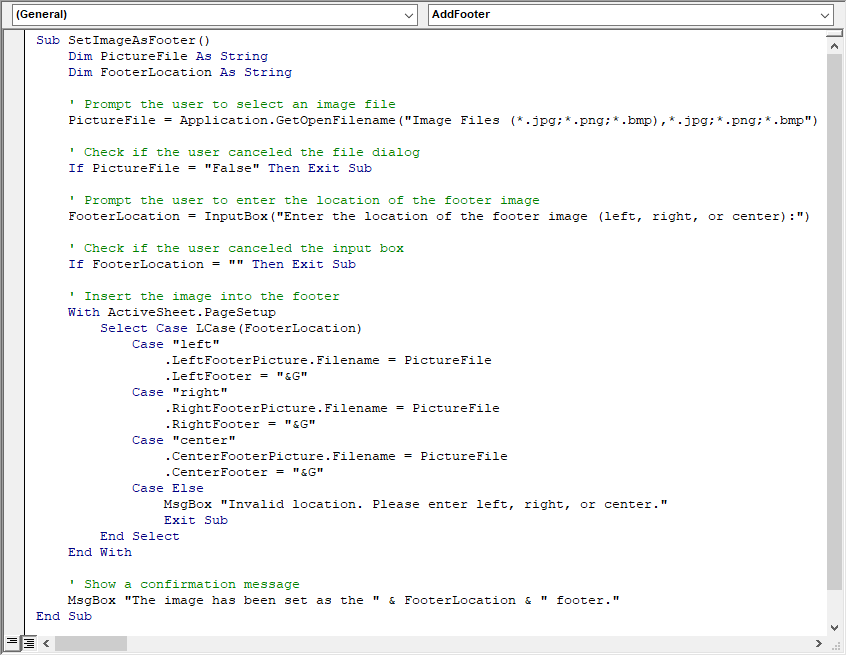
Sub SetImageAsFooter()
    Dim PictureFile As String
    Dim FooterLocation As String

    ' Prompt the user to select an image file
    PictureFile = Application.GetOpenFilename("Image Files (*.jpg;*.png;*.bmp),*.jpg;*.png;*.bmp")

    ' Check if the user canceled the file dialog
    If PictureFile = "False" Then Exit Sub

    ' Prompt the user to enter the location of the footer image
    FooterLocation = InputBox("Enter the location of the footer image (left, right, or center):")

    ' Check if the user canceled the input box
    If FooterLocation = "" Then Exit Sub

    ' Insert the image into the footer
    With ActiveSheet.PageSetup
        Select Case LCase(FooterLocation)
            Case "left"
                .LeftFooterPicture.Filename = PictureFile
                .LeftFooter = "&G"
            Case "right"
                .RightFooterPicture.Filename = PictureFile
                .RightFooter = "&G"
            Case "center"
                .CenterFooterPicture.Filename = PictureFile
                .CenterFooter = "&G"
            Case Else
                MsgBox "Invalid location. Please enter left, right, or center."
                Exit Sub
        End Select
    End With

    ' Show a confirmation message
    MsgBox "The image has been set as the " & FooterLocation & " footer."
End Sub

If you execute the above script, Excel shall ask you to select an image from the local storage of your PC or Mac.
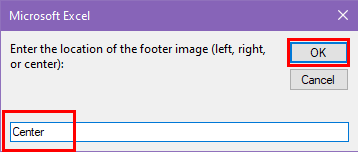
Then, Excel shall also show you an input box so you can enter the position of the footer.
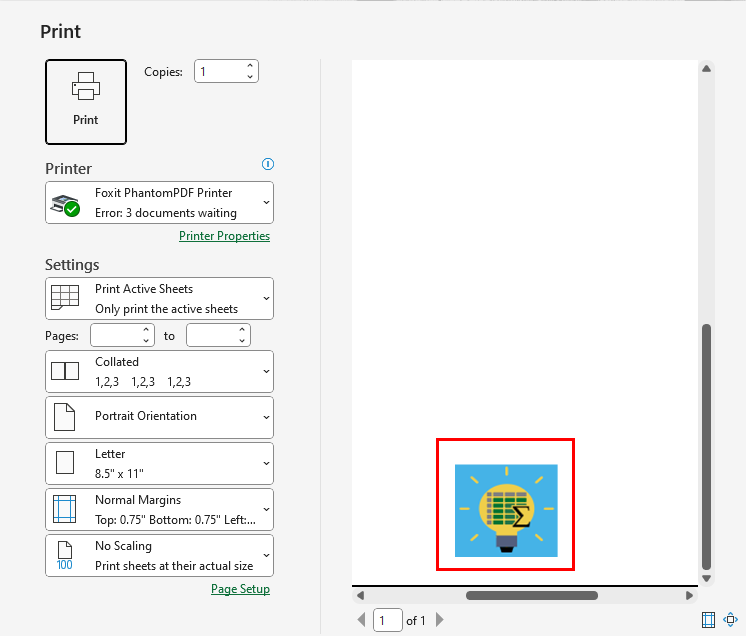
Find above the output of the VBA script.
Conclusions
So far, you’ve learned six different methods to insert a footer in Excel. These methods include Excel user interface commands, shortcut keys, and Excel VBA scripts.
Try the methods you like according to your level of Excel expertise. I personally recommend the Excel VBA-based method as it offers visual queues throughout the process.
If you need a customized VBA script to add a unique footer in Excel, you can let me know in the comment box so I can create one for you. Also, if you know a better method to add a footer in Excel, mention that in your comment.
 👉 Find out more about our Advanced Formulas course!


0 Comments