Data entry isn’t fun, but sometimes it has to be done. Excel has a neat hidden feature made just for data entry. The data entry form allows you to view one record at a time in a more natural horizontal orientation which can make the data entry a bit easier in some cases.
To use the data entry form you will need your data to be in certain format.
- One record of your data should be in one row in Excel.
- Your data should have column headings in each column above the data.
- Your data should have at least one record in it before you activate the data entry form.
Step 1: Adding the data entry form to the Quick Access Toolbar.
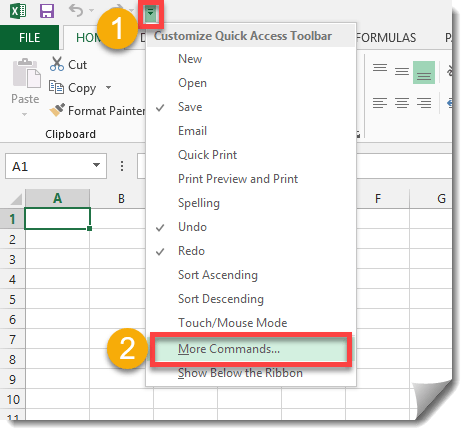
Open the quick access toolbar options menu.
- Press the small options icon to the right of the quick access toolbar.
- Select More Commands from the drop down list.
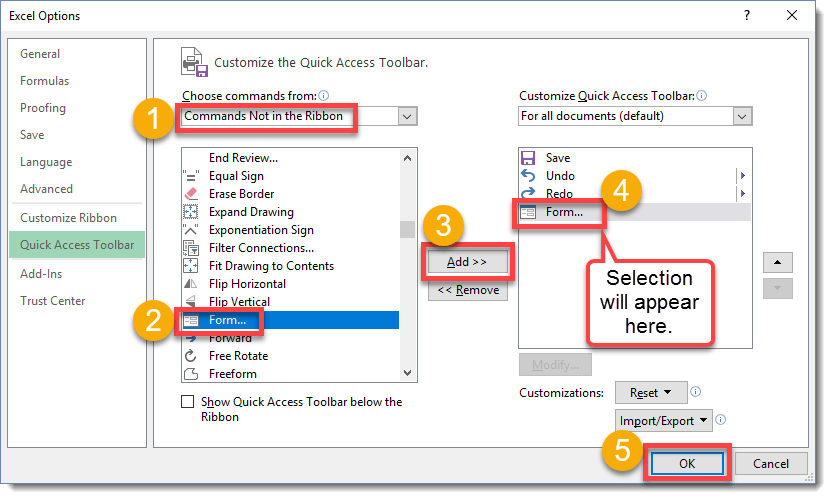
Add the Form to your quick access toolbar.
- From the Choose commands drop down list select Commands Not in the Ribbon.
- Scroll down until you see Form… and select it.
- Press the Add button.
- You should see the Form… appear in the right most box.
- Press the OK button.
Step 2: Using the data entry form.
Now we can use the data entry form.
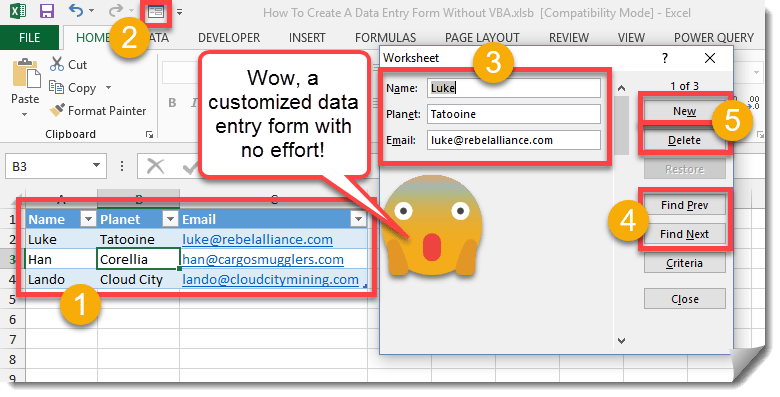
- Make sure your data is similarly formatted like the example data then place the active cell cursor anywhere inside your data.
- Each row is one record set (i.e. in our example row 2 contains all information about Luke, row 2 contains all information about Han etc…).
- Each column of data has a column heading (i.e. in our example Name, Planet and Email in row 1).
- We have at least one row of data.
- Press the Form button in the quick access toolbar.
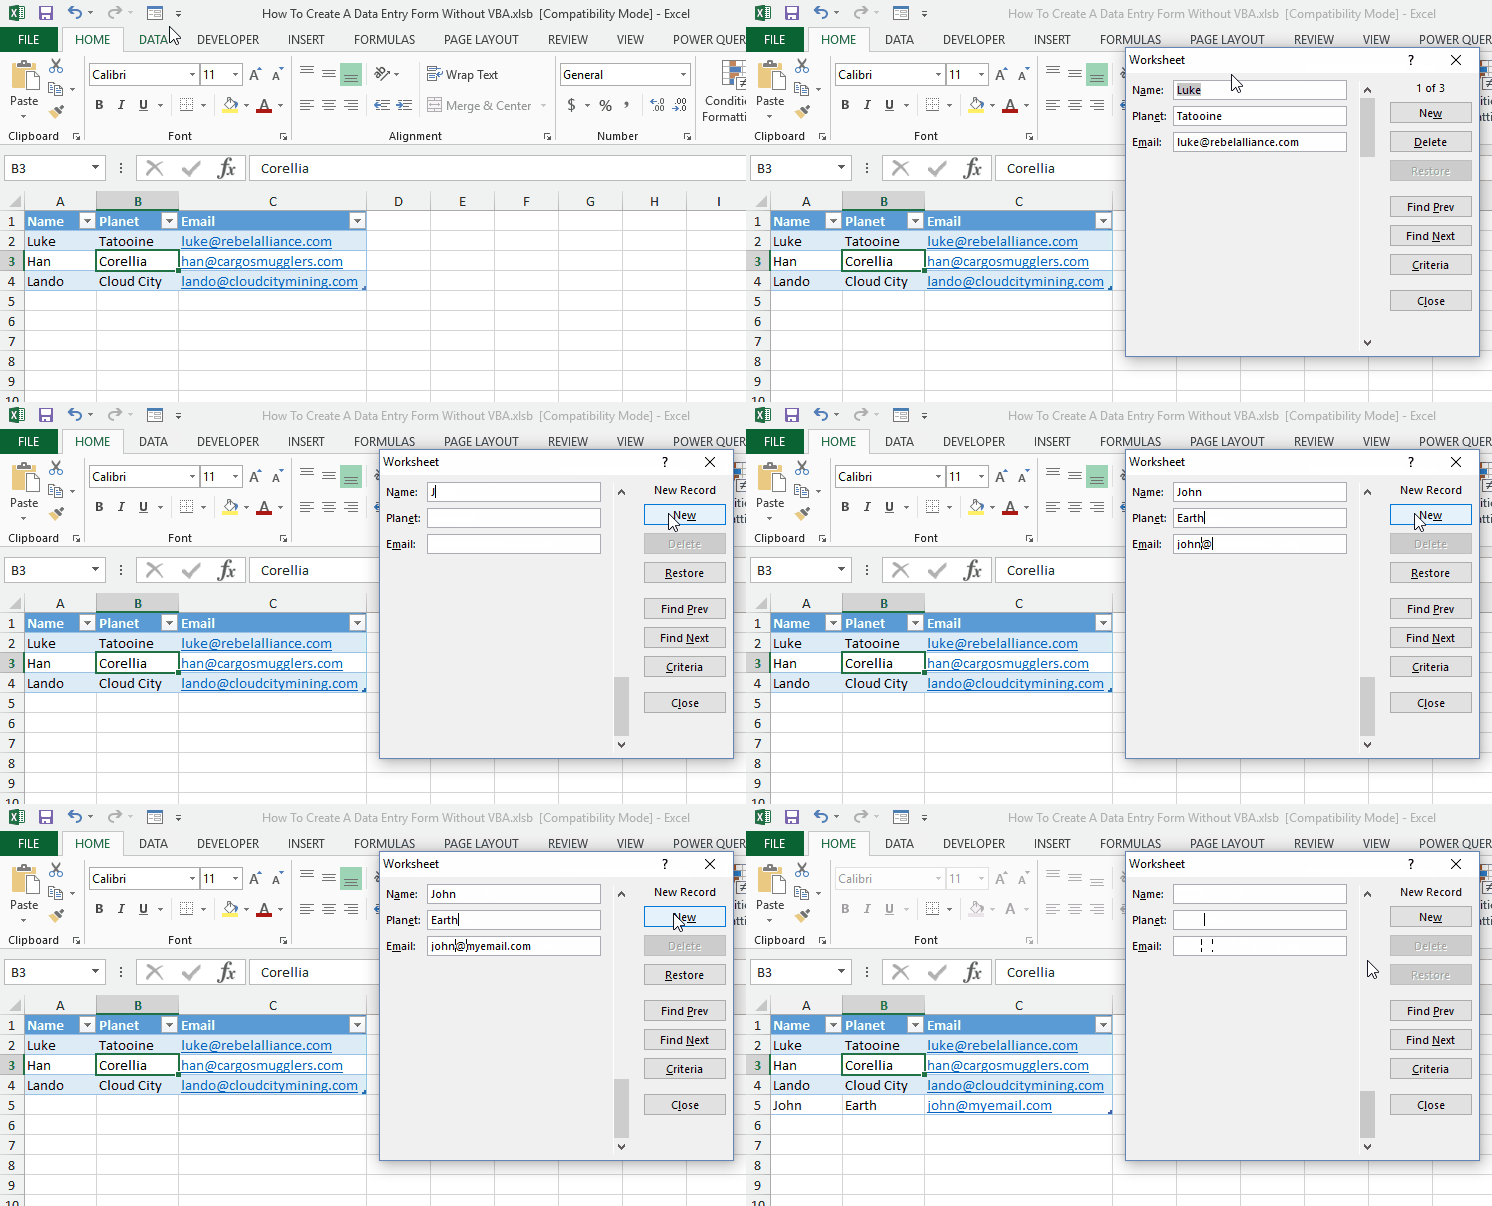
- A data entry and viewing form will appear with your data items allowing you to view or add records.
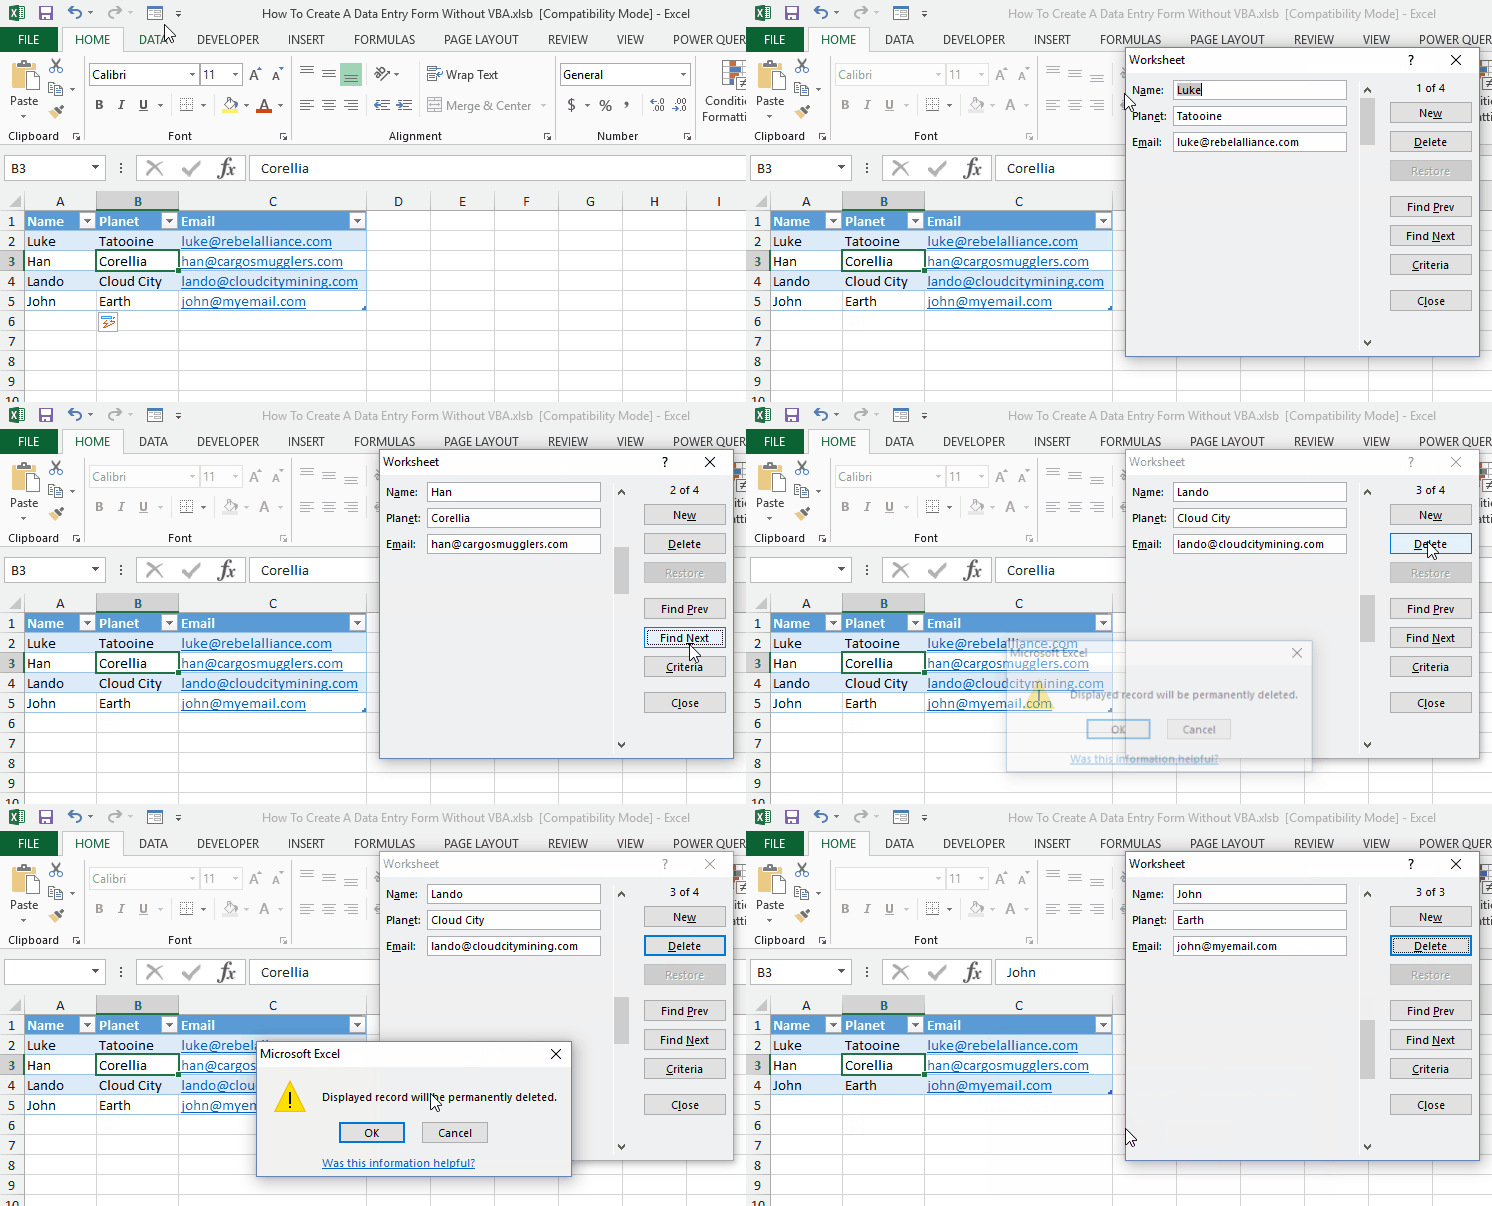
- You can navigate your existing data by using the Find Prev or Find Next button.
- You can add a record by pressing the New button or you can also delete existing records from the table with the Delete button.
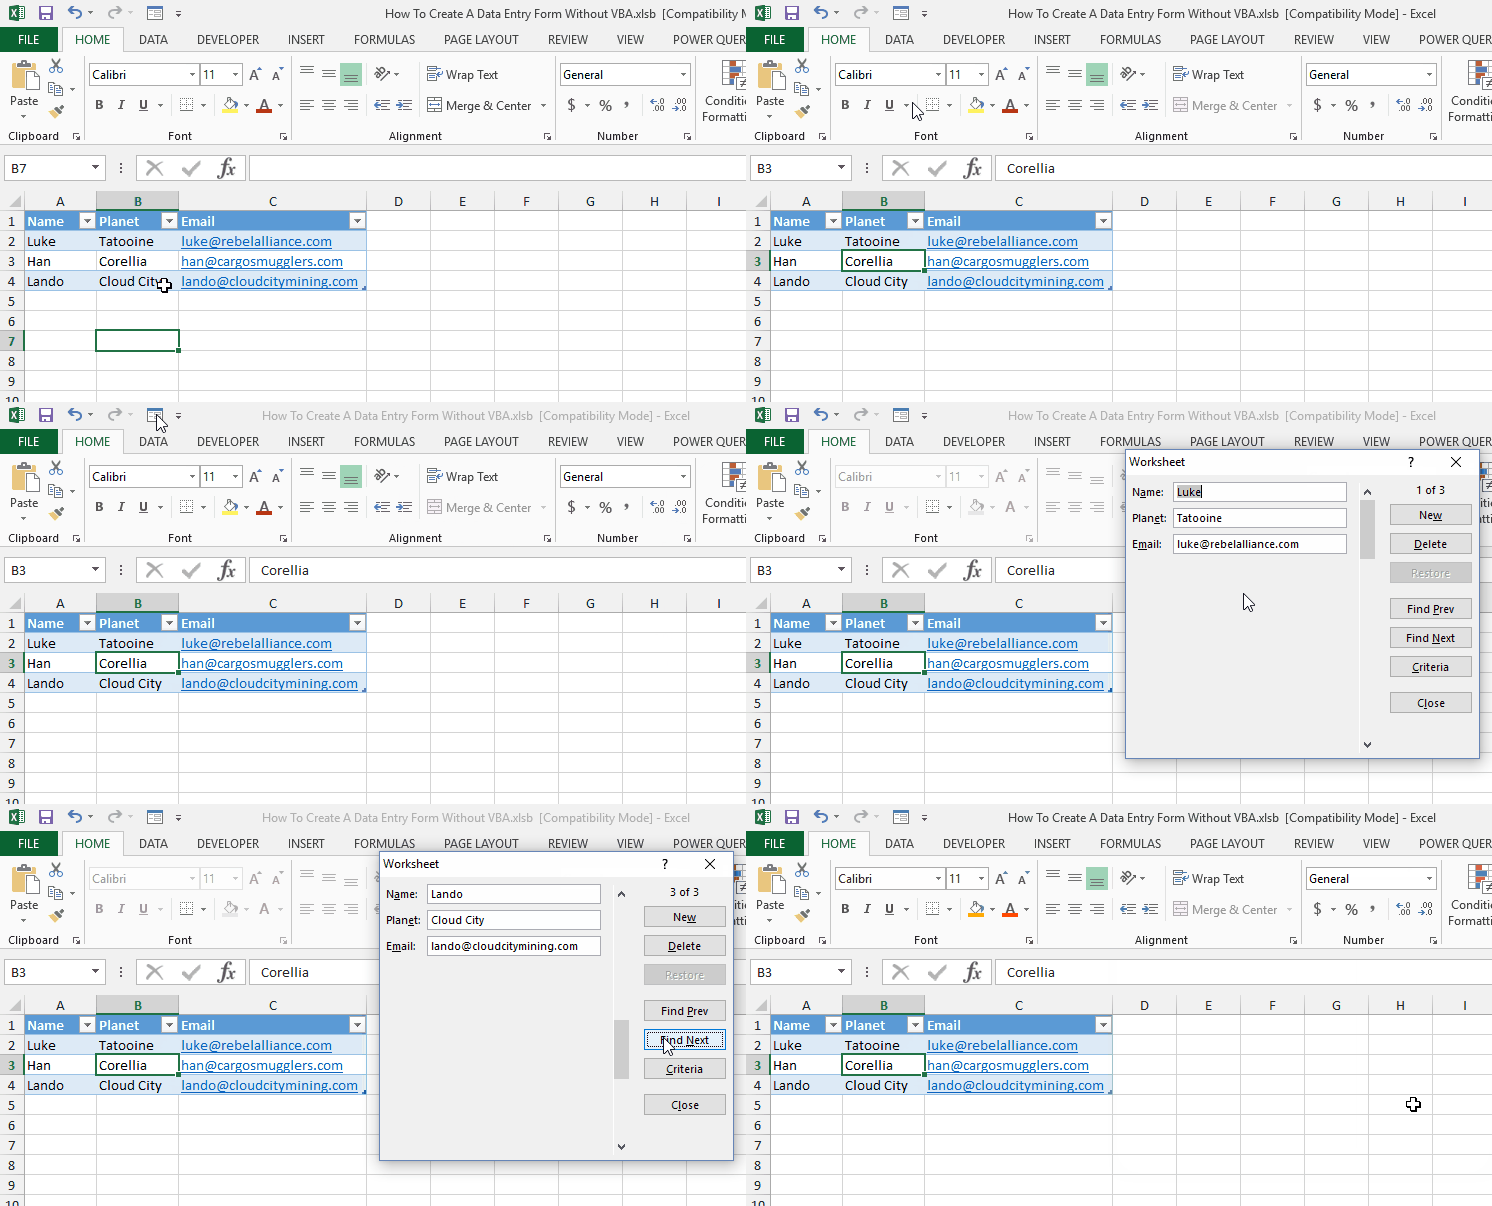
Scrolling through your data
Adding a new record
Deleting an existing record.
Wow, who knew data entry could be so much fun 😀
 👉 Find out more about our Advanced Formulas course!


0 Comments